The other day, a colleague asked me to explain how to stick pictures in their powerpoints, and I put together this quick summary:
1. Best source for clip art is:
Microsoft Clip Art
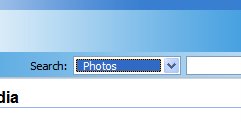
You download from the site and they get saved in your Microsoft Clip Art folder, usually. No royalty, no hassle, no legal issues. I recommend selecting the "photos" drop down to limit your search that way. Also, I find photos to be pleasantly abstract and much less offensively cheesy that animated clip art.

2. Best way to insert clip art
To insert a whole picture in Powerpoint, just select "insert a picture from file..." (see below) and that drops the whole picture into the deck.

However, the problem there is that may want to fit the picture to a specific area or size. You can do that one of two ways:
A: Crop the picture using the crop function on the picture tool bar:

B: Create a shape (like a circle) and fill it with a picture:
- create the shape
- right click on it and select "Format Auto shape"

- Select "Fill Effects" from the color box

- Select the "Picture Tab", and then select your picture

Be sure to select the "Lock picture aspect ratio" box or your picture will look funny
et Viola...

3. Clean Up Action
In order to avoid having your files become huge with excess pictures, you can crop/remove/trim the whole thing using the using the "Compress Picture" function on the picture toolbar

Click on it...

Do that when you're done with the presentation and it will trim down the file size quite a bit.
No comments:
Post a Comment